famousFilms = [('Pulp Fiction', 'Quentin Tarantino', 1994), ('Back to the Future', 'Steven Spielberg', 1985), ('Moonrise Kingdom', 'Wes Anderson', 2012)]
cursor.executemany('INSERT INTO Movies VALUES (?,?,?)', famousFiles) # 三个问号对应每行数据的三个part
records = cursor.execute(" SELECT * FROM Movies") #records储存了select的return
print(cursor.fetchall())
# 也可以用loop来fetch one by one
# for record in records: # print(record)
connection.commit() connection.close()
因为cursor works like a pointer.所以当cursor跑过result了之后,就不能再用cursor在iterate了. 的意思是,我们已经用fetchall把select的东西跑完了,再用fetchone,是不会回到第一行的数据的,会return empty. 所以把东西存在records里,是做一个copy,不会动cursor里的东西. Cursor resets after each execute, execute many command.
Tuple
1
2
3
4
5
6
7
8
9
10
11
12
13
14
15
import sqlite3

connection = sqlite3.connect('movies.db')

cursor = connection.cursor()

release_year = (1985, )

cursor.execute("SELECT * FROM Movies WHERE year=?", release_year)

print(cursor.fetchall())

connection.commit()
connection.close()
Tuples (in python) are used to store multiple items in a single variable.
mytuple = (“apple”, “banana”, “cherry”)
这里,我们要找数据中year为1985年的数据. 使用tuple的instead of string是为了prevent SQL injection attack. 如果要用python的variable来比较,得像这样,use question mark placeholder,做一个tuple values as the second argument.
Object-relational mapping(ORM)
ORM也是可以query and manipulate data的一种方式. 也有很多libraries implement ORM-like functionality. 其中有SQLAlchemy,它是一个SQL toolkit.
# engine is not same as python database APIs connection object # engine allows your application to have multiple database connections # and it manages those connections
connection = engine.connect() # this connection is actually a proxy for the true python database API connection
metadata = db.MetaData() # this metadata will hold all info about our table
movies = db.Table('Movies', metadata, autoload=True, autoload_with=engine)
query = db.select([movies])
result_proxy = connection.execute(query) # this result proxy proxies the cursor object from the python database API # we can use the result proxy to retrieve the data
result_set = result_proxy.fetchall() # result set is the actual data
print(result_set[0]) # asscess to the first object print(result_set[:2]) # first two objects
# add another row of data query = movies.insert().values(Title="Psycho", Director="Alfred Hitchcock", Year="1960") connection.execute(query) # pass the query object to connection to execute
Mysql will put database on a server instead of directly on the file system. Follows a client/server relationship. Need to send requests to the server to access or modify data in the database. In order to send requests to the database, we need to install the correct driver.
视频讲首先要下载MySQL community. 然后install + set root password via installer.
以下都是command line里的mysql create了之后. To configure the databse we’re working with.
1
use projects;
1
CREATE TABLE projects(project_id INT(11) NOT NULL AUTO_INCREMENT, title VARCHAR(30), description VARCHAR(255), PRIMARY_KEY(project_id));
查看生成的table.
1
show tables;
1
CREATE TABLE tasks(task_id INT(11) NOT NULL AUTO_INCREMENT, project_id INT(11) NOT NULL, description VARCHAR(255), PRIMARY_KEY(task_id), FOREIGN KEY(project_id) REFERENCES project(project_id));
1
INSERT INTO projects(title, description) VALUES ("Organize Photos", "Organize old iPhone photos by year");
1
2
INSERT INTO tasks(description,project_id) VALUES ("Organize 2020 Photos", "1"); INSERT INTO tasks(description,project_id) VALUES ("Organize 2019 Photos", "1");
Project_id是auto increment的所以是1和2.
1
INSERT INTO projects(title, description) VALUES ("Read more", "Read a book a month this year");
1
INSERT INTO tasks(description,project_id) VALUES ("Read the huntress", "2");
With the task table, having that foreign key constraint, we cannot inset a task without a corresponding project ID. We will also have to delete tasks before we delete the corresponding project. With special operators, such as on delete cascade, we can avoid this.
1
SELECT*FROM projects;
1
SELECT*FROM tasks;
顺便一提出去mysql环境:
1
\q
Python
要在python里写,首先要下载compliant module.
进入虚拟环境.
1 2 3
virtualenv mysql-workspace
cd mysql-workspace
source bin/active
defconnect(db_name): try: return mysql.connect( host='localhost', user='root', password='password', # the password to your database database=db_name ) except Error as e: print(e)
if __name__ == '__main__': db = connect("projects") cursor = db.cursor()
cursor.execute("SELECT * FROM projects") project_records = cursor.fetchall() print(project_records)
db.close()
For the host parameter we could put in some remote server running in AWS, but initially with MySQL installation, the host is where the database lives. Our application will send requests back and forth, to this location our localhost.
defconnect(db_name): try: return mysql.connect( host='localhost', user='root', password='password', # the password to your database database=db_name ) except Error as e: print(e)
defadd_new_project(cursor, project_title, project_description, task_descriptions): project_data = (project_title, project_description) cursor.execute('''INSERT INTO projects(title, description) VALUES (%s, %s)''', project_data ) # triple quotes is for code in different lines
project_id = cursor.lastrowid # the 自动生成的id
tasks_data = [] for description in task_descriptions: task_data = (project_id, description) tasks_data.append(task_data)
cursor.executemany('''INSERT INTO tasks(project_id, description) VALUES (%s, %s)''', tasks_data)
if __name__ == '__main__': db = connect("projects") cursor = db.cursor()
tasks = ["Clean bathroom", "Clean kitchen", "Clean living room"]
add_new_project(cursor, "Clean house","Clean house by room",tasks) db.commit() #commit database changes
cursor.execute("SELECT * FROM projects") project_records = cursor.fetchall() print(project_records)
cursor.execute("SELECT * FROM tasks") tasks_records = cursor.fetchall() print(tasks_records)
from sqlalchemy import Column, Integer, String, ForeignKey from sqlalchemy import create_engine from sqlalchemy.orm import sessionmaker, relationship from sqlalchemy.ext.declaractive import declarative_base
# 这句话我也没听懂 # to connect our database # syntax is the database type along with the driver # database type -> mysql # plus(+) the driver -> mysqlconnector # then give user and password # replace the password into your actual password # then the host for our database # by default it's at port 3306 # household is the database we just create
# echo=True makes SQLAlchemy points out SQL statement
base = declarative_base()
classProject(Base): # also can be called as models __tablename__ = 'projects' __table_args__ = {'schema':'household'}
project_id = Column(Integer, primary_key=True) title = Column(String(length=50)) description = Column(String(length=50))
Base.metadata.create_all(engine) # pass in the engine # for the create all function, if the table already exist # then SQLAlchemy will use the already existing table rather than creating new tables
# session can create data transaction # transaction is a set of all or nothing queries # we either want all of them to run or none of them to run # we never leave the database in half done state
# create the data organize_closet_project = Project(title='Organize closet', description='In a cool way') # insert into database session.add(organize_closet_project) session.commit()
tasks = [Task(project_id=organize_closet_project.project_id, description='Decide what close to donate'), Task(project_id=organize_closet_project.project_id, description='Organize winter clothes'), Task(project_id=organize_closet_project.project_id, description='Organize summer clothes')]
# to make project_id work, we need to commit the project edition first # we have to do this because auto incrementation of the primary key doesn't happen until after # the project has been added to the database # once the project insertion is committed, the database will initialize that project_id attribute # the project object itself will also be updated so project_id will no longer be null
session.bulk_save_objects(tasks) # to save a lot of data at one time session.commit()
# select the organized closet project our_project = session.query(Project).filter_by(title='Organize closet').first() # this could return lots of results, but we add first for specific instance print(our_project)
# retrieve all of the task data our_task = session.query(Task).all() print(our_task)
connect = mysql.connect( host='localhost', user='root', password='password', # the password to your database database='sales', allow_local_infile=True)
cursor = connection.cursor()
create_query = '''CREATE TABLE salesperson( id INT(255) NOT NULL AUTO_INCREMENT, first_name VARCHAR(255) NOT NULL, last_name VARCHAR(255) NOT NULL, email_address VARCHAR(255) NOT NULL, city VARCHAR(255) NOT NULL, state VARCHAR(255) NOT NULL, PRIMARY KEY(id))'''
cursor.execute("DROP TABLE IF EXISTS salesperson")
cursor.execute(create_query)
# this will read everything into string # with open('./salesperson.csv', 'r') as f: # read only format # csv_data = csv.reader(f) # for row in csv_data: # print(row) # row_tuple = tuple(row) # cursor.execute('INSERT INTO salesperson(first_name, last_name, email_address, city, state) VALUES("%s","%s","%s","%s","%s")', row_tuple) ## we do have to insert each row individually since we have to do that tuple conversion
q = '''LOAD DATA LOCAL INFILE '/Users/.../salesperson.csv' INTO TABLE salesperson FIELDS TERMINATED BY ',' ENCLOSED by '"' (first_name, last_name, email_address, city, state);'''
cursor.execute(q)
connection.commit()
curosr.execute("SELECT * FROM salesperson LIMIT 10") print(cursor.fetchall())
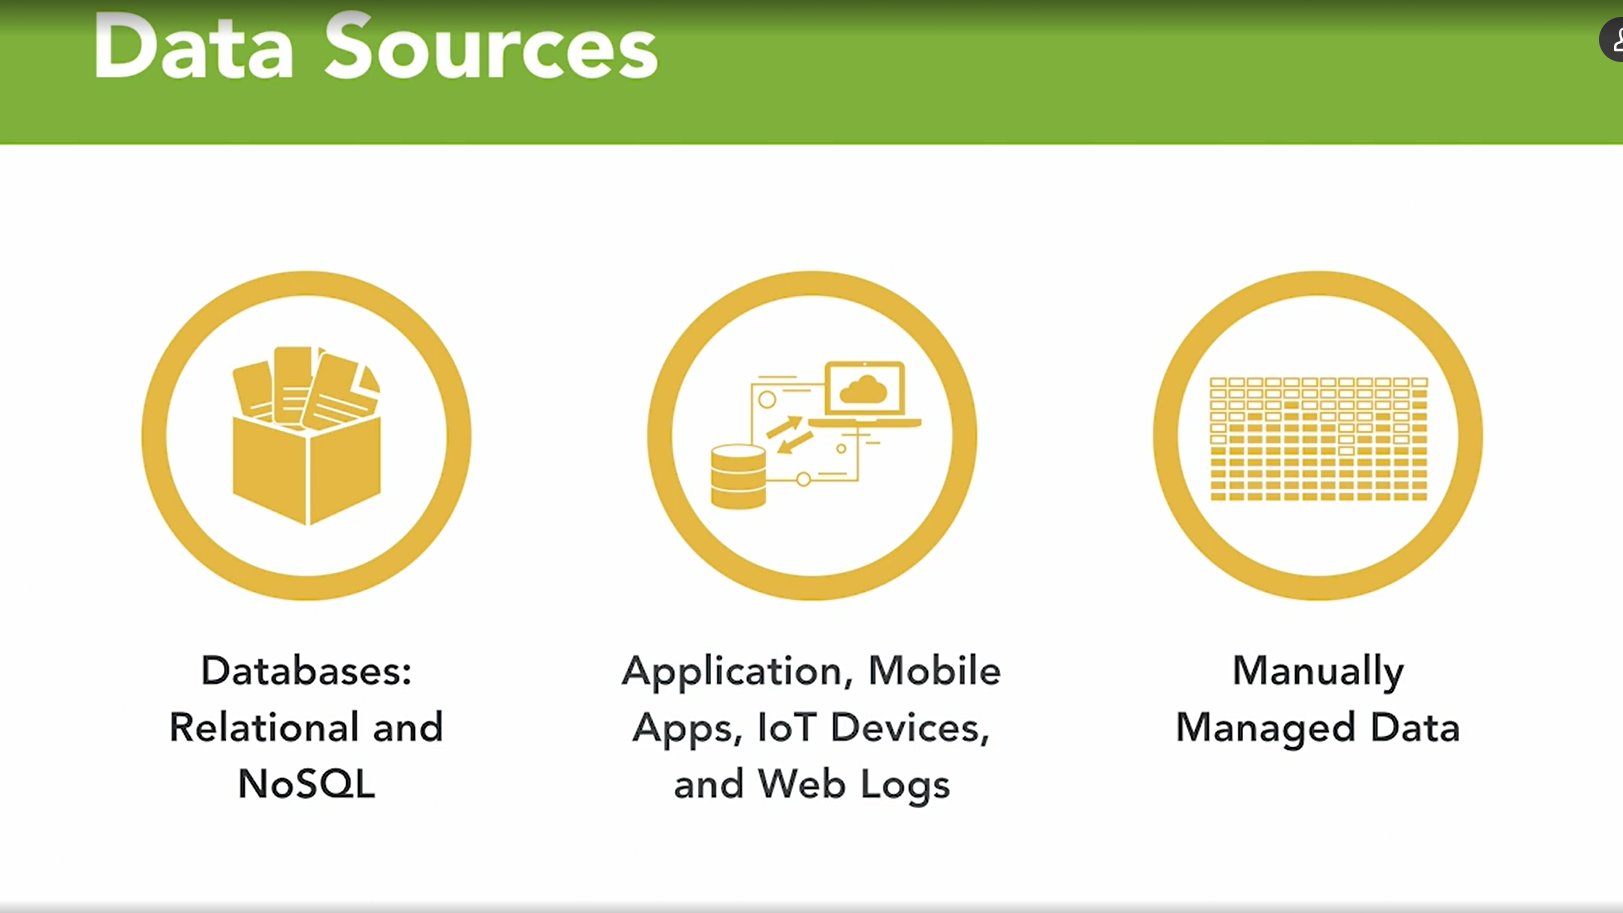
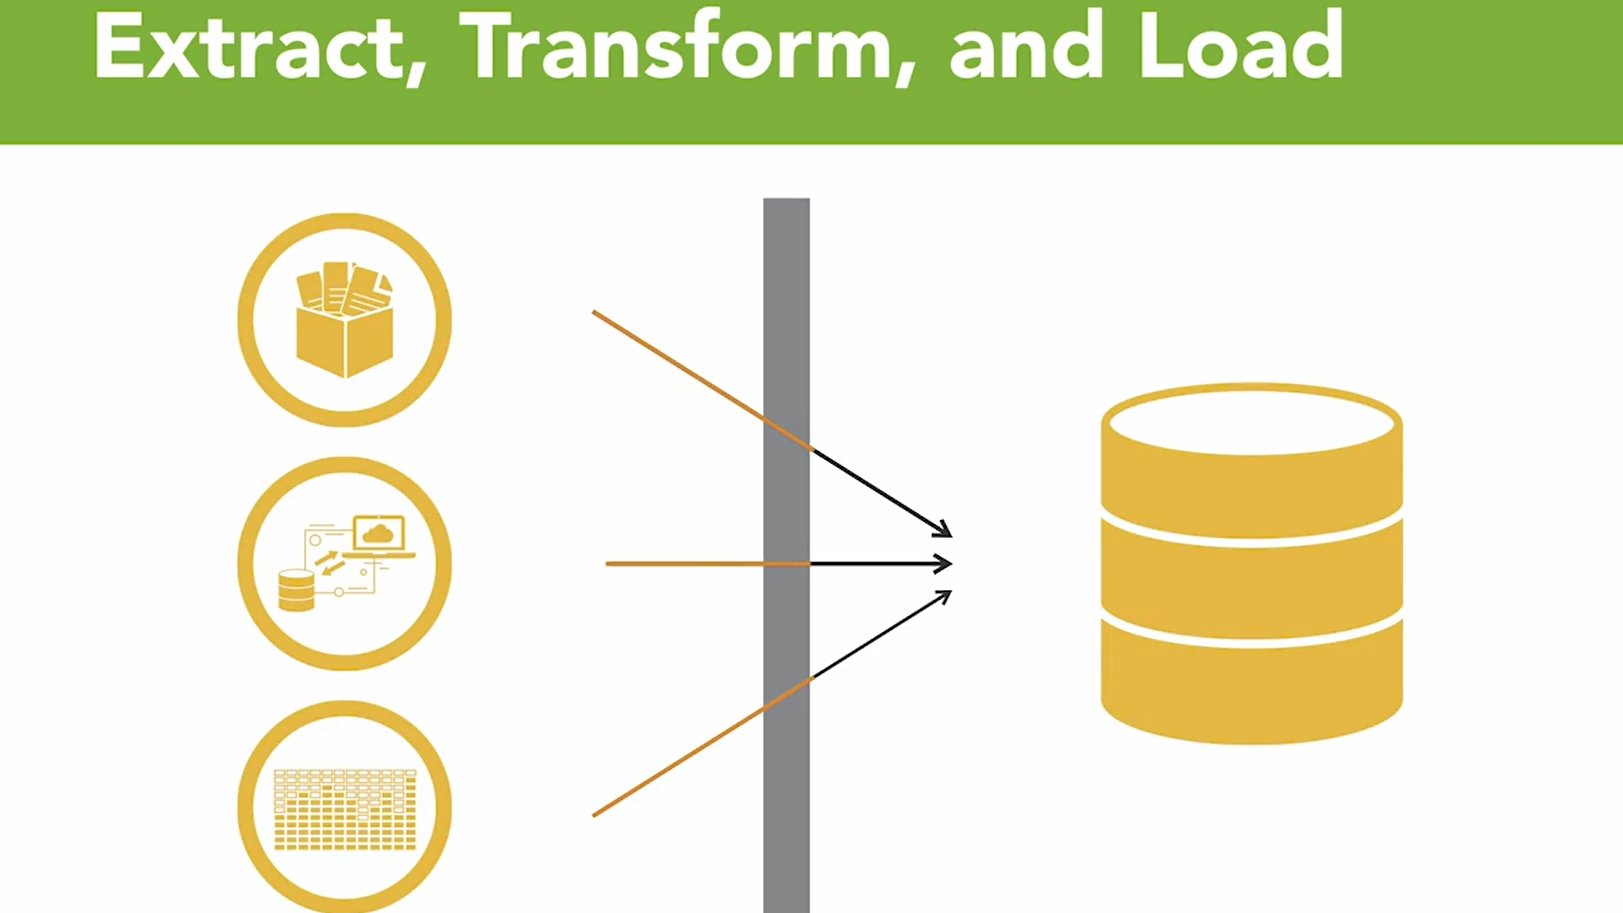
ETL, also known as extract, transformation and load. Idea is we extract or we read the data from it source, database or spreadsheet. Or we extract it from applications of IoT data streams, and then we do things to transform the data. We can think of each data source as a puzzle piece, and the transformation is the operations that help us reshape those puzzle pieces so that they all fit together in a logical way. Finally once we have the data transformed then we can load it into a relational database, at which point we can then start using SQL to analyze it.
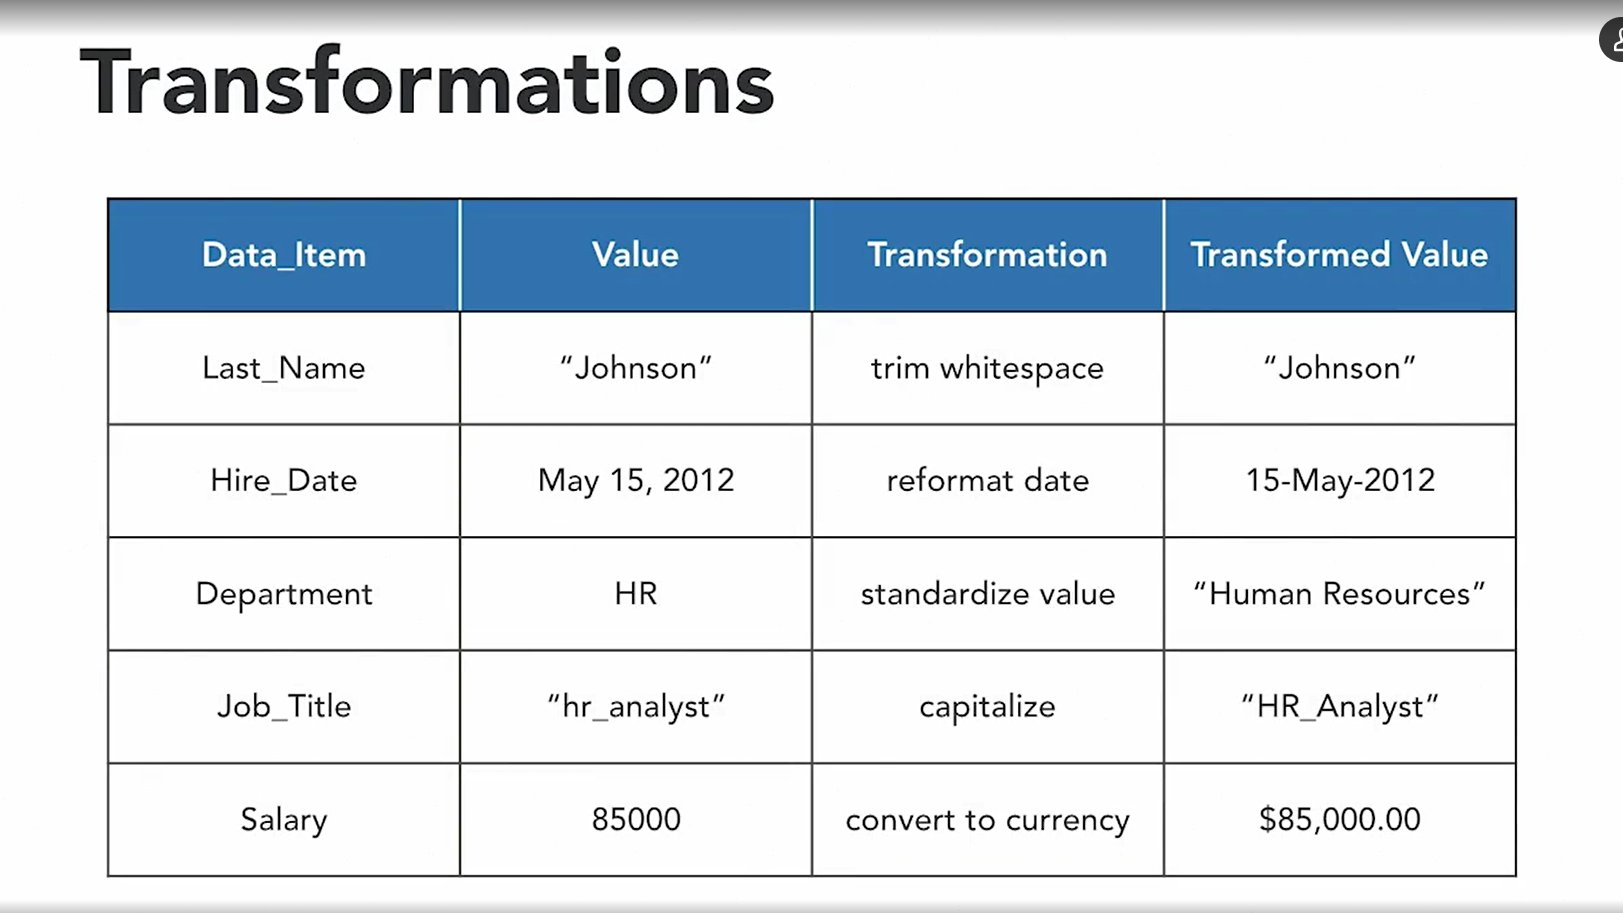
Transformation is a board topic, it could be as simple as removing out the white spaces or tabs at the beginning or end of the text. We also have to reformat dates. Different system use different representation for dates, so we want to make sure we have a consistent way of looking at dates. Also two different system that talks about the same thing, say for example, the departments in your organization they might use different codes to refer to them. So one application might use two letter codes to refer to departments and another application might spell out the whole name of the application. When transform, we need to pick the standard way of categorizing data or standard sets of codes and make sure we consistently use those.